How to Make Sea Moss Gel in 3 Easy Steps
Step 1: Rinse and Soak
Ingredients:
- Raw sea moss
Instructions:
- Rinse: Begin by thoroughly rinsing your raw sea moss under cold water to remove any impurities and sea debris. It’s important to wash it until the water runs clear, ensuring that all traces of sand and salt are gone.
- Soak: Place the cleaned sea moss in a large bowl and cover it with filtered or spring water. Add a squeeze of lime or lemon juice if you prefer; this can help neutralize the slight sea-like taste of the moss. Allow the sea moss to soak for at least 12-24 hours at room temperature. The moss will expand and soften as it absorbs the water.
Step 2: Blend
Ingredients:
- Soaked sea moss
- Water (for blending)
Instructions:
- Drain: After soaking, drain off the water and give the sea moss another quick rinse under cold water.
- Blend: Transfer the sea moss to a blender. Add just enough fresh water to cover it, which will help in achieving the right consistency. Blend on high until it becomes smooth and creamy. If the mixture is too thick, add a little more water until you reach the desired consistency of a gel.
Step 3: Store
Instructions:
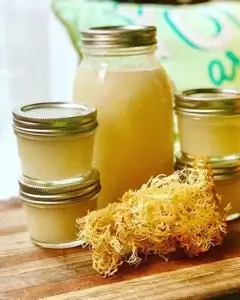
- Transfer: Spoon the sea moss gel into a clean glass jar with a lid.
- Refrigerate: Store the sea moss gel in the refrigerator. It will continue to thicken as it cools. Typically, sea moss gel can be kept for up to three weeks when stored properly in the fridge.
Using Your Sea Moss Gel
Sea moss gel is incredibly versatile. Here are a few ways to use it:
- In Smoothies: Add one to two tablespoons to your smoothies for a nutrient boost.
- As a Thickener: Use it in soups and sauces as a natural thickener.
- In Skin Care: Apply it directly to the skin as a hydrating face mask.
- Back Home